Gesture Detection with YOLOv8: Brainrot Edition
Recognising gestures with YOLOv8 and pulling up brainrot images based on that...
Lowkey, I seem to have a knack for useless projects: While I was always thinking about dipping my toes in Computer Vision, I was always struggling to find a project I'd have fun working on, and which uses my webcam. Inspired by a TikTok, I decided to train a pre-trained YOLO model on gesture and facial recognition. Here's my GitHub repository (don't ask why it's named that way). Anyways, here's how I did it!
1. Getting Started with YOLOv8
To build a computer vision project, we first need a computer vision model. Of the models that I know of, You Only Look Once (YOLO) models were the ones I was the most familiar with (I used it in freakcha) I decided to use YOLOv8 because it's the more stable and mature version of the YOLO family.
Note to anyone who's trying this in a Linux environment - it doesn't work natively. WSL doesn't expose the webcam so I couldn't get the webcam to open. After switching to a native Windows environment and reinstalling the needed packages, everything finally worked!
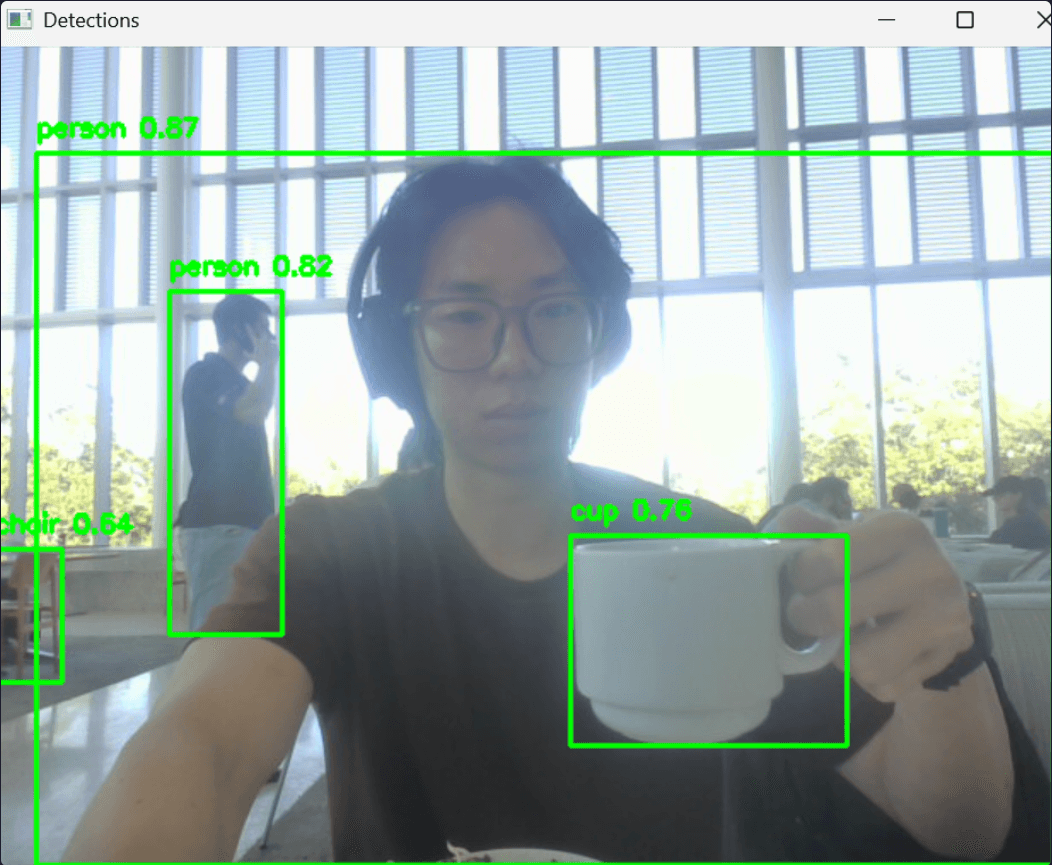
Out of the box, the detection models worked surprisingly well: They recognized everyday objects like spoons, cups, bowls, people, even with minimal setup. Here’s a snippet of my detection loop:
	for detection in detections:
		# detection usually contains [x1, y1, x2, y2, score, class_id]
		x1, y1, x2, y2 = map(int, detection[:4])
		score = float(detection[4])
		class_id = int(detection[5])
		if score > 0.5:  # confidence threshold
			cv2.imshow('Detections', frame)
			cv2.rectangle(frame, (x1, y1), (x2, y2), (0, 255, 0), 2)
			cv2.putText(frame, f"{model.names[class_id]} {score:.2f}", (x1, y1 - 10),
						cv2.FONT_HERSHEY_SIMPLEX, 0.5, (0, 255, 0), 2)
I think OpenCV made everything really easy to understand and use, so it was a blast trying and experimenting.

2. Using DeepFace for Emotion Recognition
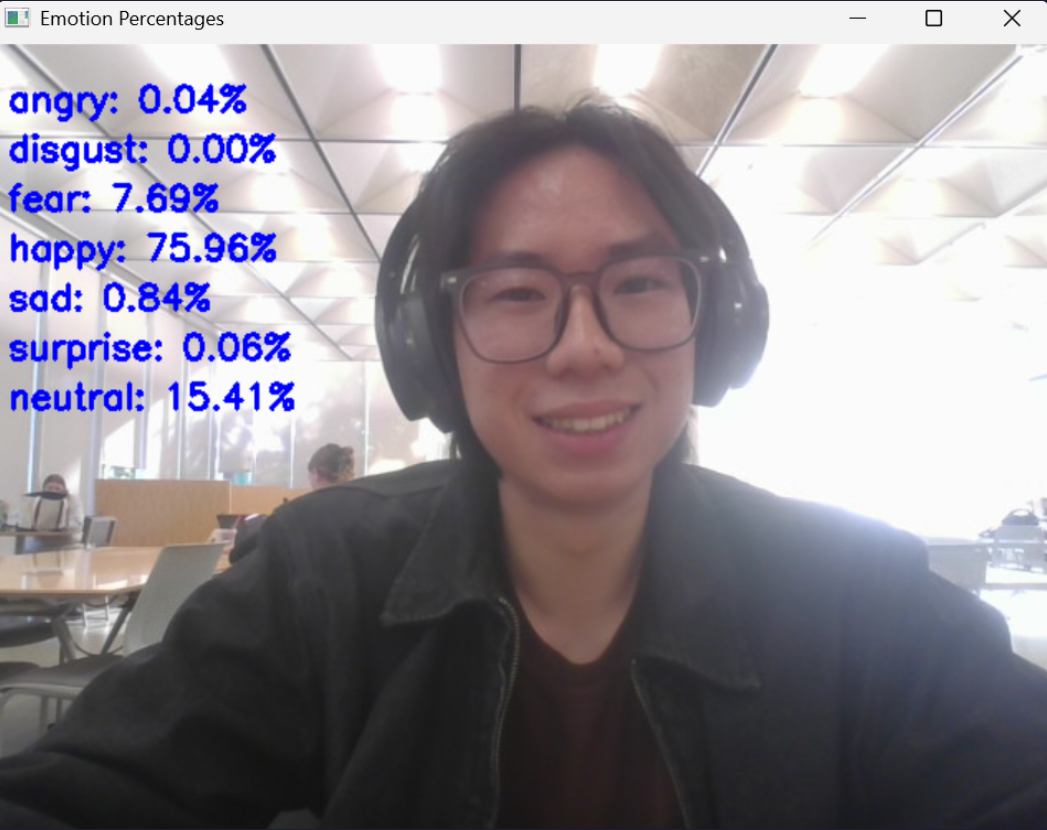
Object detection is cool and all, but I wanted something that could be fun on my webcam. I decided to pivot to emotion recognition, and tried exploring DeepFace! It's an easy to use library for facial recognition, and emotion recognition too.
3. Pivoting to Gesture Recognition
Inspired by those successes, I decided to pivot the project to gesture recognition, like recognizing the 6-7 joke (although I didn't go with that in the end). I thought about fun use-cases like TikTok reaction images. I was thinking if using DeepFace was feasible but it's only limited to like 7 emotions, which wouldn't work for me.
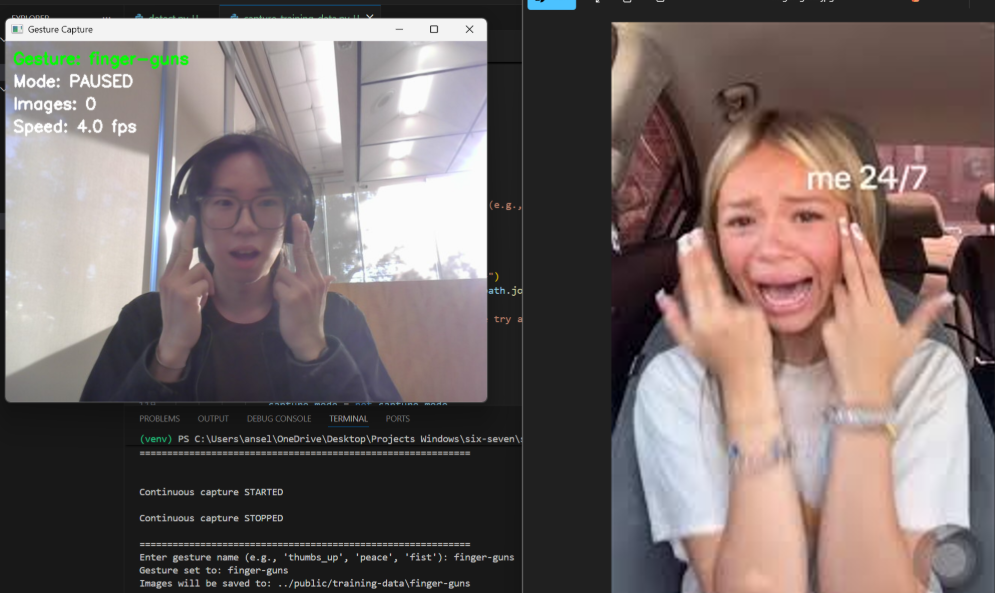
In the end, I decided to go with brainrot TikTok reaction images, and decided to train the model on me (duh!). Instead of taking every picture myself, I wrote a small Python script to automate taking photos with my webcam and I collected ~100 images per class for 9 classes (total of 1000+ images).
Here's a summary of my preprocessing and augmentation:
Preprocessing
- Auto-orient images
- Resize/stretch to 224 × 224
- Grayscale (Colour doesn't matter here)
Augmentation
- Horizontal flip
- Rotation between –15° and +15°
- Exposure change: ±10%
- Blur up to ~2.5 px
Then I uploaded the dataset to Roboflow and set up a ViT (Vision Transformer) classification workflow. Training was estimated to take ~30+ minutes.
I also made sure I understood how ViT classification works (for readers unfamiliar):
How ViT Classification Works
- Image Patching: The input image is divided into a sequence of fixed-size, non-overlapping patches
- Linear Embedding: Each patch is linearly projected into a vector, known as a patch embedding.
- Positional Embedding: A learnable positional embedding is added to the patch embedding to retain spatial information about the patch's original location. A special
[CLS]token is often prepended to the sequence to be used for classification.
- Transformer Encoder: This sequence of embedded patches is fed into a standard transformer encoder, which consists of multiple layers of self-attention and feed-forward networks.
- The self-attention mechanism allows each patch to attend to every other patch, modeling long-range dependencies across the image.- Classification Head: The output of the transformer encoder for the
[CLS]token is then fed into a simple classification head (e.g., a linear layer) to predict the final class.## 4. Running Inference Locally via Roboflow + YOLOv8
Once the model was trained, I integrated the inference into my webcam pipeline using the InferencePipeline wrapper from Roboflow. I built a parser to extract the predicted class from the verbose output (since I'm using a detect-and-classify workflow). It's actually pretty cool how Roboflow wraps everything for you - it's quite beginner friendly.
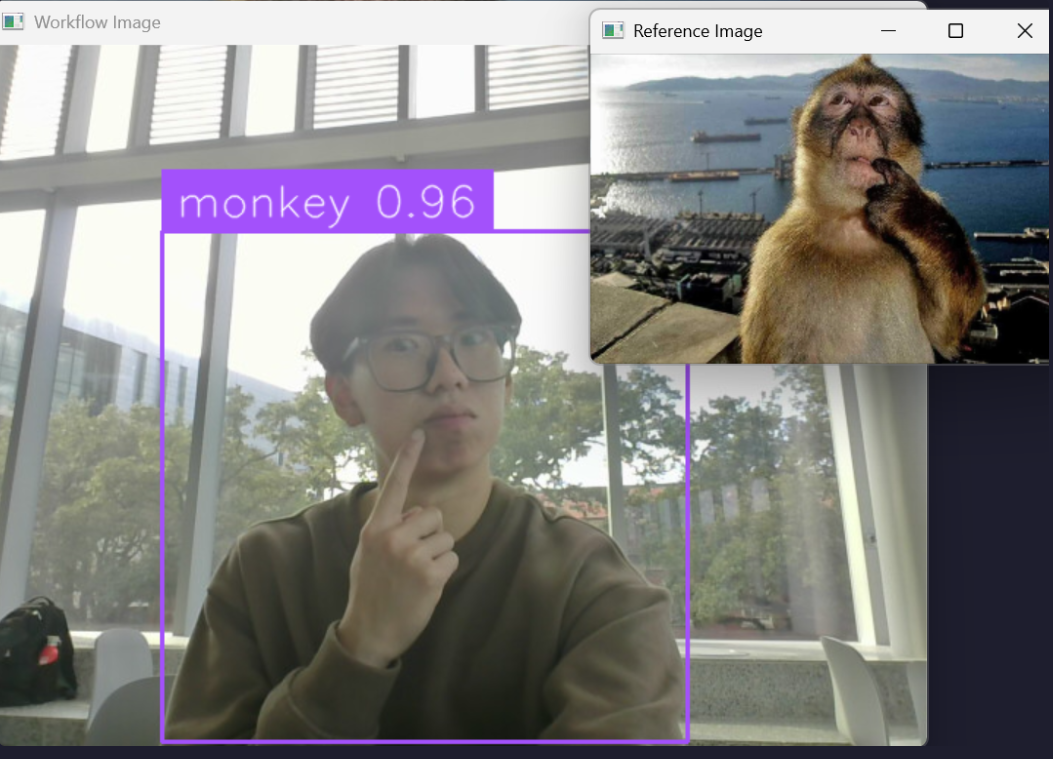
After many error fixing steps later, it finally worked and could detect gestures in real time! Currently it runs reliably on some of the gesture classes, but others still fail or mis-classify. So, my next step: Add more training data (especially for the weak classes) and retrain the model to improve generalisation.
5. Retraining the Model with New Classes
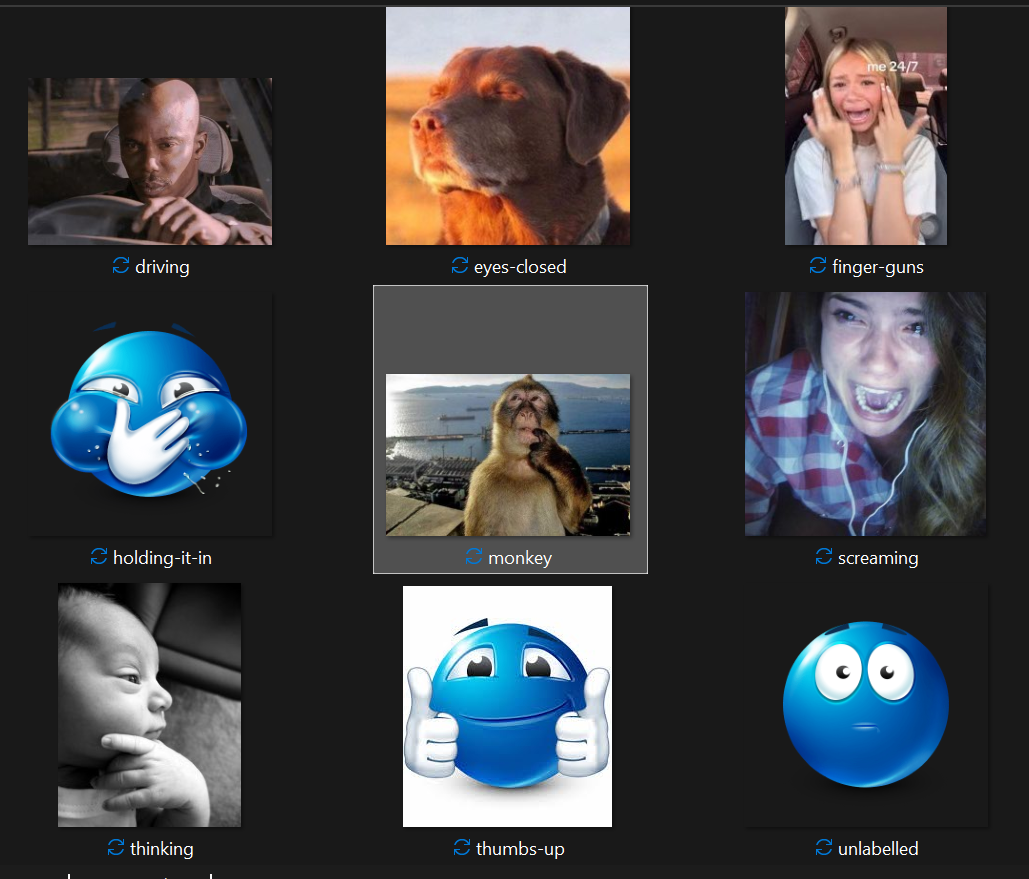
Some of my classes were too similar - I had a monkey picture and a girl biting her finger. They were too similar, so my monkey wasn't being called out at all. I decided to get rid of the girl with finger bite and keep the monkey instead. I added more training images for underrepresented classes and retrained another model with the same architecture.
In the end, my final 9 classes are as follows:
Another problem was that my FPS was quite low. I decided to try optimize my code a bit:
- Instead of displaying a picture every frame, I only update the reference image when the detected class changes. This helped but because I'm running locally, I've kinda resigned to my fate that my laptop is just slow.
This time, another image was underrepresented. It's now just a repeat of adding more training images and seeing if the model can generalize.
6. It Works... Generally!
My model now works for most classes, but some classes are now overrepresented. It seems when I add more training data of one class, it screws up the balance. Probably need to retrain my model again.
This was a toy project to get familiar with gesture detection, but I need people to train the model on for it to properly generalize.
Some learning points!
- Distinctiveness of gesture classes matters. If two gestures look very similar (hand near face vs. finger in mouth, for example), the model will confuse them.
- Hardware/environment setup still matters even when the model works: Factors like camera angle, lighting, user pose, background clutter and whether the gesture dominates the frame all influence performance strongly.
Overall, this was a really fun project to do! I'll definitely try more computer vision in the future.